
In greenhouse farming, what happens above the soil often gets all the attention the crops, the irrigation, the lighting. But beneath the surface lies an invisible battleground that can make or break your entire harvest.
Soil-borne diseases are fungal, bacterial, and pest-related problems that live in the soil and attack plant roots, stems, and seedlings. They are one of the leading causes of crop failure in greenhouses across Kenya and the world. Unlike outdoor farms where nature helps dilute these threats, a greenhouse’s warm, enclosed environment creates the perfect conditions for these diseases to multiply rapidly.
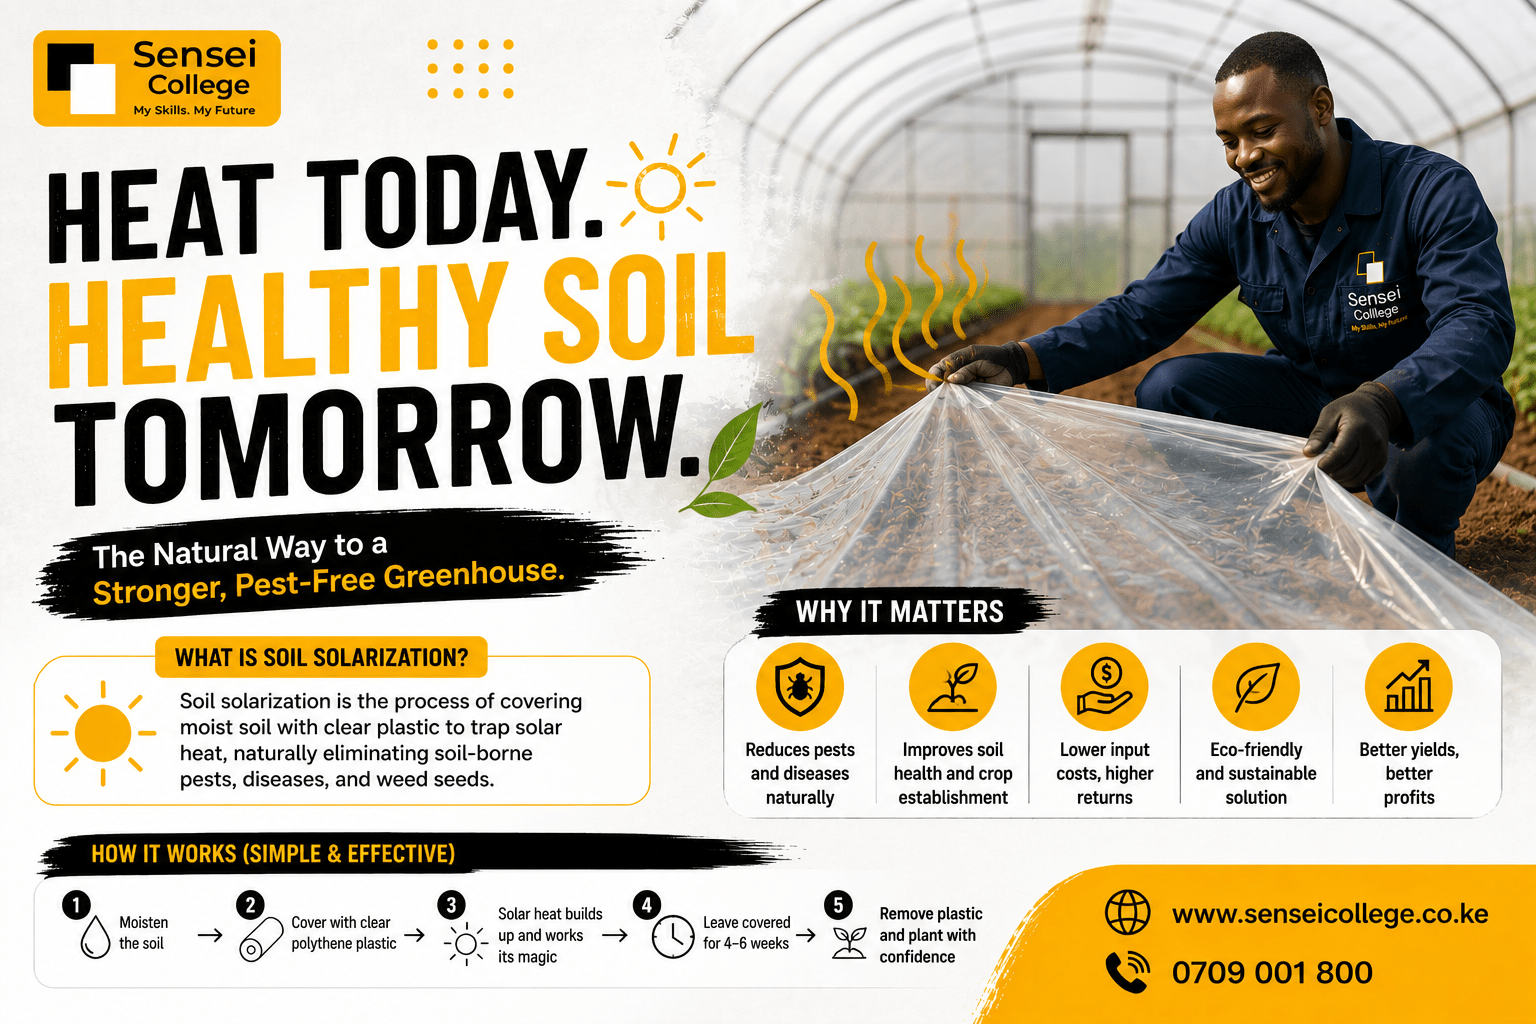
One of the most effective, affordable, and chemical-free solutions to this problem is soil solarization, a technique that uses the sun’s heat, trapped under a plastic sheet, to kill harmful pathogens in the soil before planting begins.
This article explains what you need to know about managing soil-borne diseases through solarization: what it is, how it works, why it matters, and how to do it right.
Soil-Borne Diseases and Soil Solarization
What Are Soil-Borne Diseases?
Soil-borne diseases are illnesses that affect plants through pathogens that live in or on the soil. The most common types include:
- Fungi such as Fusarium, Pythium, Rhizoctonia, and Sclerotinia cause root rot, damping-off, and stem wilting.
- Bacteria like Ralstonia solanacearum are responsible for bacterial wilt in tomatoes and peppers.
- Nematodes – microscopic worms that attack plant roots, stunting growth and reducing yield.
- Weed seeds – not diseases themselves, but weeds compete with crops for nutrients and water and often harbour disease-carrying insects.
In a greenhouse setting, the recycled soil, warm temperatures, and consistent moisture create a habitat where these pathogens thrive and spread fast, especially if the same crops are grown in the same soil year after year.
What Is Soil Solarization?
Soil solarization is a non-chemical soil disinfestation method that uses solar energy to heat the soil to temperatures high enough to kill or significantly reduce harmful organisms. It involves:
- Moistening the soil thoroughly
- Covering it with a clear or transparent polyethylene plastic sheet
- Leaving it in place for 4 to 6 weeks (or longer in cooler climates)
The plastic acts like a greenhouse within your greenhouse; it traps heat from the sun and raises the soil temperature in the top layers to between 45°C and 70°C (113°F–158°F). Most disease-causing fungi, bacteria, nematodes, and weed seeds cannot survive these temperatures.
It is a simple concept with powerful results, and it requires no chemicals, making it ideal for farmers pursuing organic or low-input farming systems.
Importance of Soil Solarization in Greenhouse Farming
1. Effective Disease and Pest Control
Solarization significantly reduces populations of dangerous fungi like Fusarium oxysporum and Pythium spp., which are responsible for widespread crop losses in greenhouse tomato, pepper, cucumber, and flower production. It also suppresses root-knot nematodes, which are difficult to control without expensive chemicals.
2. Reduced Weed Pressure
Weed seeds are heat-sensitive. Solarization destroys most weed seeds in the upper 15–20 cm of soil, dramatically reducing the time and cost spent on manual weeding after planting.
3. Improved Soil Nutrient Availability
Heat treatment increases the availability of key nutrients, especially nitrogen, calcium, and magnesium, by speeding up the breakdown of organic matter. This means your crops may grow more vigorously after solarization without additional fertilization.
4. Chemical-Free and Environmentally Friendly
Solarization replaces or reduces the need for chemical fumigants like methyl bromide, a toxic, ozone-depleting substance that is now banned in many countries. This makes solarization safe for farmers, consumers, and the environment.
5. Cost-Effective for Smallholder Farmers
Compared to expensive pesticide applications or soil replacement, solarization requires only a plastic sheet, water, and sunshine. In Kenya, a roll of clear polyethylene plastic costs a fraction of what chemical soil treatments would require for the same area.
6. Better Crop Establishment and Higher Yields
Healthier soil means healthier seedlings. Crops planted in solarized soil tend to establish faster, experience less transplant shock, and ultimately produce higher and more consistent yields.
How to Solarize Your Greenhouse Soil
Step 1: Clear the Greenhouse Bed
Remove all crop residues, old roots, and plant debris from the soil. These can harbour disease and insect pests. Rake the surface smooth, breaking up large clods so the plastic sheet can lie flat and make full contact with the soil.
Step 2: Till the Soil
Loosen the soil to a depth of at least 25–30 cm (10–12 inches) using a fork, hoe, or rotary tiller. This allows heat to penetrate deeper and ensures no pockets of air or compaction block the heating process.
Step 3: Incorporate Organic Matter
This is an excellent time to mix in well-composted manure or other organic amendments. As the soil heats up, organic matter breaks down quickly, releasing nutrients that will be available for your next crop. This step is optional but recommended.
Step 4: Water the Soil Thoroughly
Irrigate the prepared bed until the soil is moist to a depth of at least 30 cm. Moist soil conducts heat much better than dry soil. This is a critical step you should not skip. The soil should feel like a wrung-out sponge: damp but not waterlogged.
Step 5: Lay the Plastic Sheet
Cover the moist soil with a clear transparent polyethylene plastic sheet, 25–50 microns (0.025–0.05 mm) thick. Transparent plastic allows sunlight to pass through while trapping heat. Do not use black plastic, as it absorbs heat on the surface but does not allow the sun’s rays to penetrate and heat the soil below.
- Pull the plastic tight and flat across the bed.
- Bury or secure the edges with soil, sandbags, or stones to prevent air from entering.
- Seal any gaps or tears with tape or additional soil.
Step 6: Leave in Place for the Recommended Duration
Allow the plastic to remain for:
- 4–6 weeks during Kenya’s hot, sunny months (January–March or July–September)
- 6–8 weeks during cooler or cloudier periods (e.g., the long rains season)
- In high-altitude areas like the Rift Valley or Central Kenya highlands (above 1,800 m), extend treatment to 8–10 weeks due to lower ambient temperatures
Step 7: Remove the Plastic Carefully
After solarization is complete, remove the plastic sheet without disturbing the treated soil too much. Avoid deep tilling after treatment, as this can bring untreated soil (with live pathogens) back to the surface.
Step 8: Plant Promptly
Plant or transplant your seedlings within 1–2 weeks of removing the plastic. The longer you wait, the more the soil can be recolonized by pathogens from the surrounding environment.
Best Practices for Kenyan Greenhouse Farmers
-
Choose the Right Season
Solarization works best when solar radiation is at its peak. In Kenya, the hottest and sunniest periods are January to March and mid-July to September. Plan your solarization to coincide with these windows before the main planting season.
-
Use Double-Layer Plastic for Higher Altitude Areas
In cooler highland areas, a single plastic layer may not generate sufficient heat. Use two layers of plastic with a small air gap between them; this creates an insulating effect and raises soil temperatures by an additional 2–6°C.
-
Combine Solarization with Biofumigation
For even more powerful disease control, incorporate brassica crop residues (cabbages, kale, or mustard greens) into the soil before solarization. As these materials decompose under the heat, they release natural fumigant compounds (glucosinolates) that enhance the killing effect. This combination is called biosolarization.
-
Use Solarization Between Crop Cycles
The best time to solarize is immediately after harvesting one crop and before planting the next. This fits naturally into greenhouse management without wasting productive time.
-
Monitor Soil Temperature
Use a soil thermometer to confirm that temperatures are reaching 45°C or higher at a depth of 10 cm. If not, check for gaps in the plastic, insufficient initial watering, or heavy cloud cover. Many Kenyan agro-dealers stock affordable soil thermometers for under KES 1,000.
-
Pair Solarization with Resistant Varieties
No single method eliminates 100% of soil-borne pathogens. After solarization, plant varieties that are certified as resistant or tolerant to common diseases like Fusarium wilt or bacterial wilt. Seed suppliers like Kenya Seed Company and international brands (Rijk Zwaan, Syngenta) offer disease-resistant greenhouse varieties.
Common Mistakes to Avoid
Using Black Plastic Instead of Clear Plastic
Black plastic heats the surface only and blocks sunlight from penetrating the soil. Always use clear or transparent polyethylene. This is one of the most common errors among first-time
Solarizing Dry Soil
Without adequate moisture, the soil cannot conduct heat effectively. Always irrigate deeply before covering. Dry soil solarization can raise surface temperatures but fails to penetrate and kill organisms deeper in the soil profile.
Leaving Gaps in the Plastic
Any opening around the edges allows cool air to enter, reducing the temperature inside. Be thorough when securing the plastic edges. Use a continuous border of soil or sandbags around the entire perimeter.
Deep Tilling After Treatment
After removing the plastic, avoid digging or tilling the soil deeply. Deep tillage brings up untreated soil that still harbours pathogens. Use a shallow hand fork or transplanting tools to disturb the surface as little as possible.
Waiting Too Long to Plant After Solarization
Treated soil is temporarily “clean” but can be recolonized by airborne or water-borne pathogens over time. Plant within 1–2 weeks of removing the plastic to take full advantage of the clean growing environment.
Expecting Solarization Alone to Solve All Problems
Solarization is highly effective but works best as part of an Integrated Pest Management (IPM) strategy. Combine it with crop rotation, resistant varieties, clean irrigation water, and good greenhouse hygiene for long-lasting soil health.
Tools, Materials, and Requirements
Here is what you need to carry out soil solarization effectively:
| Item | Specification | Approx. Cost (Kenya) |
| Clear polyethylene plastic | 25–50 microns, UV-stabilized | KES 2,000–5,000 per roll (covers 100 m²) |
| Drip irrigation or hosepipe | For deep, even watering | Existing system or KES 3,000–8,000 |
| Soil thermometer | To verify the target temperature | KES 500–1,500 |
| Garden fork/tiller | For deep soil tillage | KES 800–2,500 (or rental) |
| Sandbags or soil | For sealing plastic edges | Free (use on-site soil) |
| Compost or manure | Optional incorporation | KES 500–2,000 per 50 kg bag |
| Adhesive tape (UV-resistant) | For patching tears in plastic | KES 200–400 |
Cost-Saving Tips:
- Source plastic in bulk with neighbouring greenhouse farmers to reduce unit cost.
- Reuse plastic sheeting from previous solarization cycles if it is intact and clean (maximum 2–3 reuses).
- Use a simple metal stake thermometer from a hardware store as an affordable alternative to digital soil thermometers.
Frequently Asked Questions (FAQs)
1. How long does soil solarization take to work?
In most Kenyan lowland and mid-altitude areas with full sun, effective solarization takes 4 to 6 weeks. In cooler highland areas above 1,800 metres, extend the treatment to 8 to 10 weeks to achieve the same level of pathogen control. Consistency of sunshine during the treatment period is more important than the total number of days.
2. Can I solarize during the rainy season?
Solarization is possible during the rainy season but is significantly less effective because cloud cover reduces solar radiation. If you must solarize during rainy periods, extend the treatment duration by at least 2–4 extra weeks and check that the plastic remains tightly sealed at all times to prevent cooling from rain.
3. Will solarization kill beneficial soil organisms like earthworms?
Solarization does affect some beneficial soil organisms in the top layers of soil. However, beneficial microorganisms typically recover faster than pathogens after treatment, and earthworms usually move deeper into the soil where temperatures remain lower. Over time, the improved soil environment with less disease pressure supports a healthier overall soil ecosystem.
4. Is soil solarization safe for organic greenhouse farming?
Yes. Soil solarization uses only sunlight and water; no chemicals are involved. It is fully compatible with certified organic farming standards and is recognized by major organic certification bodies as an approved soil management practice.
5. Does solarization work for all types of soil-borne diseases?
Solarization is highly effective against many common soil-borne pathogens, including Fusarium, Verticillium, Pythium, Sclerotinia, and root-knot nematodes. However, some highly resistant organisms may require repeat solarization cycles or additional control methods. It is most effective when used as part of a broader IPM programme.
6. How often should I solarize my greenhouse soil?
For greenhouses with a history of soil-borne disease problems, solarize once per year, typically between major crop cycles. For new or healthy greenhouse soils, once every 2–3 years, combined with good crop rotation practices, is sufficient to maintain soil health.
Conclusion
Soil-borne diseases are a silent but serious threat to greenhouse productivity across Kenya and East Africa. They can devastate entire crops, erode profits, and discourage even the most dedicated farmers.
Soil solarization offers greenhouse farmers a proven, affordable, and environmentally responsible way to clean their soil before planting. By harnessing the power of the sun, it eliminates harmful fungi, bacteria, nematodes, and weed seeds without toxic chemicals, leaving behind a healthier, more productive growing environment.