
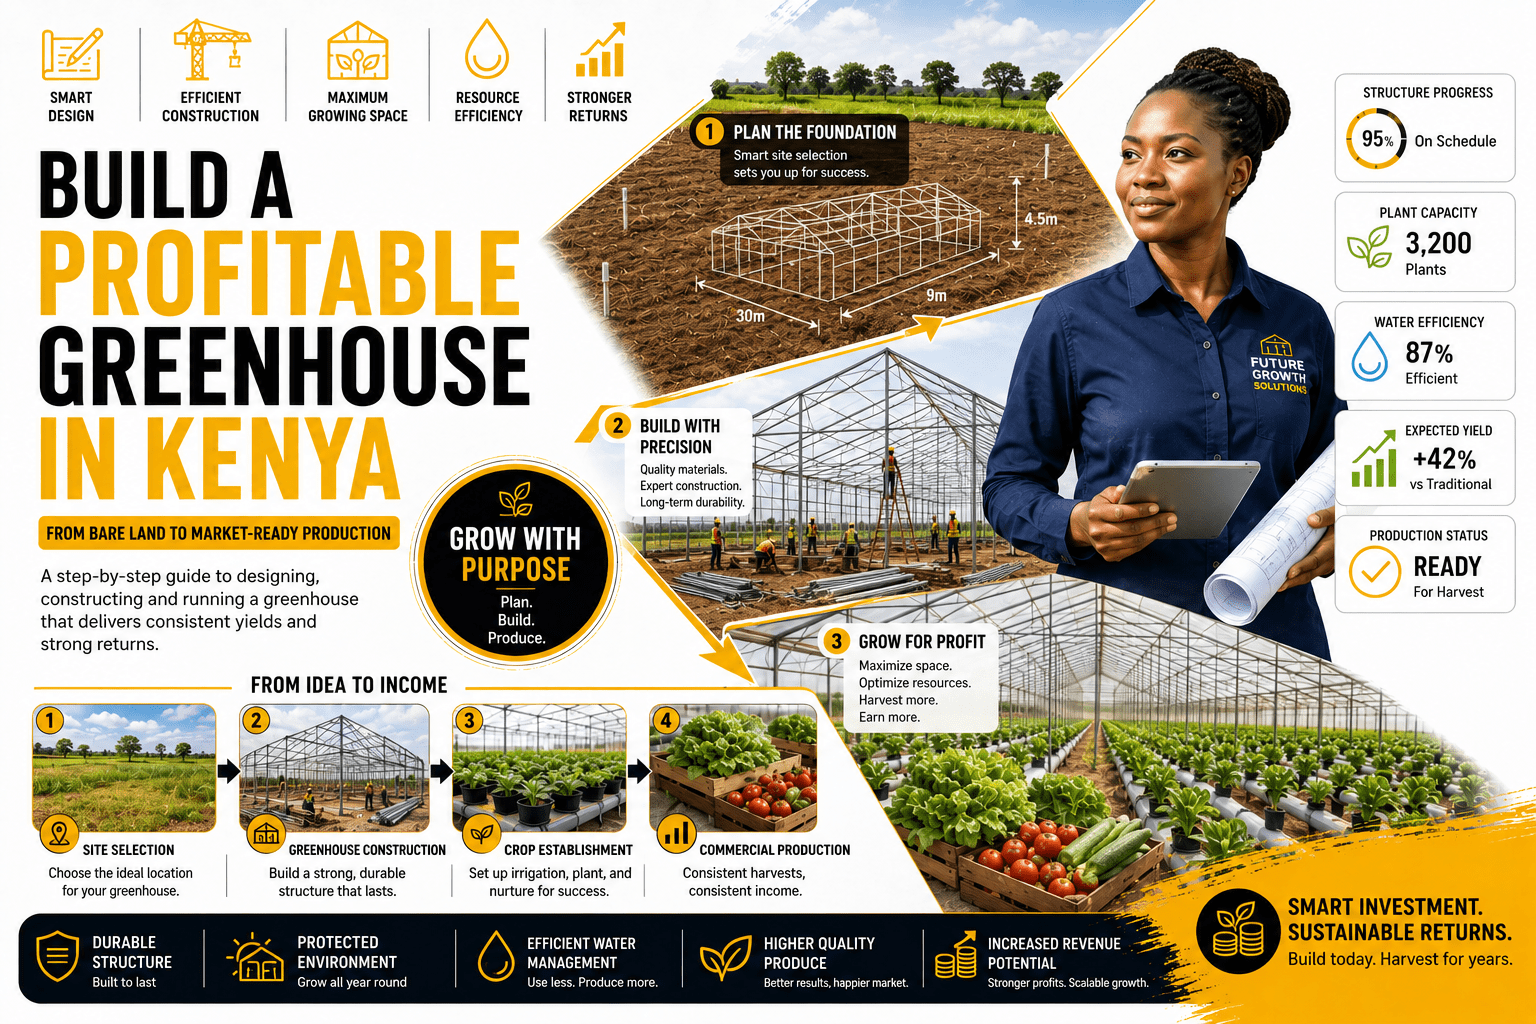
The ability to grow food year-round, in any climate, with predictable results is one of the most powerful capabilities modern agriculture offers.
Greenhouse construction makes this possible by creating controlled environments where temperature, humidity, light, and CO₂ can be precisely managed to maximize crop production regardless of the season outside.
As populations grow, arable land shrinks, and climate unpredictability intensifies, growing crops inside engineered structures is a cornerstone for food security.
This guide will walk you through what an aspiring agri-builder needs to know, from foundation types to smart climate control systems.
How a Greenhouse Works
A greenhouse works on a simple principle: solar radiation passes through a transparent covering and is absorbed by plants, soil, and interior surfaces, which then re-emit energy as longer-wave infrared radiation. The covering traps this heat inside, raising interior temperatures above the outdoor ambient level.
Beyond passive solar heating, modern greenhouses use active systems heaters, coolers, ventilation fans, shade screens, and supplemental lighting to maintain optimal growing conditions throughout the year.
Types of Greenhouses
- Lean-To Greenhouse – Built against an existing wall (barn, house). The wall provides structural support and retains heat. Suitable for small-scale operations.
- Freestanding Greenhouse – A standalone structure with a curved or gothic arch profile. Quonset hoop houses are the most affordable entry-level option.
- Gutter-Connected Greenhouse – Multiple greenhouse bays connected at the gutters. The most common type for commercial production. Maximizes covered area per unit of foundation, heating, and infrastructure cost.
- Venlo-Style Glass Greenhouse – A glass-covered, steel-framed structure originating from the Netherlands. The gold standard for high-tech commercial horticulture. Used in large tomato, cucumber, and pepper operations.
- Tunnel House Greenhouse – A simple, low-cost structure using bent metal hoops covered with a single layer of greenhouse poly film. Not typically heated used for season extension.
Key Terms
- Bay width: The distance between gutter posts across the width of a greenhouse section.
- Ridge height: The highest point of the greenhouse structure.
- Light transmission: The percentage of incoming solar radiation that passes through the covering material.
- U-value: A measure of heat loss through the covering material; lower is better for insulation.
- VPD (Vapor Pressure Deficit): A measure of the “drying power” of the air, critical for managing plant transpiration and disease risk.
- R-value: Insulation effectiveness relevant for ground covers, double-layer coverings, and thermal screens.
Tools, Equipment, and Materials Needed
Construction Tools
- Post hole digger or auger – For driving ground anchors or digging foundation holes
- Concrete mixer – For footings and anchor pads
- Pipe bender – For bending galvanized steel hoops (for tunnel houses)
- Metal cutting saw (cold saw or angle grinder) – For cutting structural steel
- MIG or TIG welder – For custom steel fabrication
- Cordless drill and bit set – For fastening aluminum extrusions and poly connections
- Level, tape measure, string lines – For accurate layout
- Scaffold or mobile elevated work platform – For working at ridge height
- Rivet gun – For fastening aluminum cladding channels
Structural Materials
Frame Options:
- Hot-dipped galvanized steel – The industry standard for commercial greenhouses. Rust-resistant, strong, long-lasting (25–50+ years with proper coating).
- Aluminum – Lightweight, corrosion-resistant, used for glazing bars and cladding profiles in glass greenhouses. More expensive than steel.
- Pressure-treated wood – Used for small hobby greenhouses. Susceptible to moisture over time.
- HDPE pipe – Used for low-cost hoop house frames. Flexible and UV-stabilized.
Foundation Options:
- Concrete perimeter wall – Most permanent, best thermal mass
- Driven ground posts (galvanized steel) – Fast installation, removable
- Concrete piers with anchor bolts – Intermediate permanence
Covering Materials
| Material | Light Transmission | Lifespan | Insulation | Cost |
| Single glass | 90% | 25–50 years | Low | High |
| Double-pane glass | 80% | 25–50 years | Medium | Very High |
| Twin-wall polycarbonate (8mm) | 80% | 10–15 years | Good | Medium |
| Triple-wall polycarbonate (16mm) | 70% | 10–15 years | Very Good | Medium-High |
| Single-layer greenhouse film (6 mil) | 87% | 3–4 years | Low | Very Low |
| Double-layer inflated film | 83% | 3–4 years | Good | Low |
Climate Control Equipment
- Horizontal airflow (HAF) fans – Circulate air inside to prevent disease
- Exhaust fans and louvers – Active ventilation
- Ridge vents (roof vents) – Passive ventilation
- Unit heaters (gas, electric, hot water) – Heating
- Evaporative coolers (pad and fan system) – Cooling in hot, dry climates
- Shade cloth / retractable shade screens – Reduces light and temperature
- CO₂ generators or tanks – Supplement CO₂ for enhanced plant growth
- Grow lights (HPS or LED) – Supplemental lighting for winter or dark climates
Irrigation and Growing Systems
- Drip irrigation manifolds
- NFT (Nutrient Film Technique) troughs – For hydroponic lettuce and herbs
- Dutch bucket systems – For tomatoes, cucumbers, peppers in coco coir or rockwool
- Grow bags/substrate troughs
- Fertigation injectors (Dosatron or computer-controlled)
Greenhouse Construction Process
Step 1: Site Selection and Preparation
- Orientation: In the Northern Hemisphere, orient the ridge (long axis) east-west to maximize solar gain in winter. In equatorial regions, north-south orientation distributes light more evenly.
- Drainage: Ensure the site drains well; waterlogged soil causes structural and sanitation problems. Grade the site to slope 1–2% away from the structure.
- Wind exposure: Identify the prevailing wind direction. Position the narrow end into the prevailing wind to reduce wind load on the structure.
- Access to utilities: Mark locations of electrical, water, and gas supply connections.
- Clear and level the site using a skid steer or grader. Remove all vegetation.
- Mark the perimeter with string lines and stakes, checking for squareness using the 3-4-5 right-angle method or diagonal measurement.
Step 2: Foundation Installation
For driven ground posts – most common for commercial greenhouses:
- Mark gutter post locations along the perimeter at the correct bay spacing (typically 4m/13ft).
- Drive galvanized steel ground posts to the correct depth using a post driver, typically 30–36 inches deep in good soil, deeper in sandy or expansive soil.
- Ensure all posts are at the correct height and are plumb using a level.
- Install concrete footings at gable end corners and at any point where structural loads concentrate.
For perimeter wall foundations:
- Dig a perimeter trench 12–18 inches deep and 8 inches wide.
- Pour a concrete footing (2000 PSI minimum) with anchor bolts positioned for the baseplates.
- Allow 7 days minimum curing before loading.
Step 3: Erect the Main Steel Frame
- Install gutter posts first these are the vertical columns that support the gutter (the horizontal beam connecting the tops of the columns).
- Install gutters between posts. Gutters must be level along the entire length. Use a water level or laser level to verify.
- Install internal trusses or bow-rafters from the gutter to the ridge, forming the roof profile.
- Install the ridge beam (purlin) along the apex.
- Install horizontal bracing between rafters at the required spacing for the covering material.
- Install end-wall (gable) frames; these typically include framing for doors, vents, and louvers.
- Install diagonal bracing cables or rods in the gable bays for wind stability.
Steel erection at height is hazardous. Use proper scaffolding, safety harnesses, and have at least two workers for all overhead operations.
Step 4: Install Ventilation Systems
Ventilation is not optional; it is critical for temperature control, humidity management, and CO₂ replenishment.
- Ridge vents: Install motorized ridge vent panels along the length of the roof. These open automatically to allow hot air to escape.
- Side wall vents or roll-up sides: For tunnel-style or low-tech greenhouses, roll-up sides provide excellent ventilation.
- Exhaust fans: Install in the gable end walls, sized to achieve one air change per minute under cooling conditions.
- Intake louvers: Install on the opposite gable wall from the exhaust fans. Louvers open automatically when fans run.
- HAF fans: Mount horizontal airflow fans along the interior perimeter walls at plant height, angled to create a circular airflow pattern.
Step 5: Install Covering Material
For polycarbonate panels:
- Install aluminum glazing channels along purlins and on gutter flanges.
- Cut polycarbonate panels to length using a fine-tooth circular saw blade or jigsaw.
- Seal the top edge of polycarbonate panels with aluminum tape and the bottom edge with vented end closure tape.
- Slide panels into channels from the outside, ensuring the UV-protected side faces outward.
- Install locking cap profiles over the channels to secure panels.
- Caulk all perimeter edges with greenhouse-grade silicone sealant.
For polyethylene film:
- Roll film over the structure from ridge to gutter.
- Tension evenly and secure with the wiggle wire into the aluminum channel installed along the structure’s frame.
- For a double-layer film, install an inflation blower to pressurize the space between layers. This dramatically improves insulation.
Step 6: Install Heating System
- Size the heating system using a heat loss calculation (based on surface area, U-value of covering, minimum design temperature, and desired interior temperature).
- Install unit heaters (gas-fired, most commonly) under the gutters, directing warm air downward.
- Connect gas supply lines. This must be done by a licensed gas plumber/fitter in most jurisdictions.
- Installing perimeter hot water heating pipes for root zone heating dramatically improves energy efficiency.
- Install a heating thermostat at plant height in the center of the greenhouse.
Step 7: Install Supplemental Lighting
- Determine if supplemental lighting is required based on the local winter light levels.
- Install LED grow lights on hanging cables at the appropriate height above the crop canopy.
- Wire lighting circuits through a panel board; high-power LED fixtures (600W–1000W) require dedicated 240V circuits.
- Install light controllers/timers to extend the photoperiod or provide supplemental DLI.
Step 8: Install Irrigation and Growing Systems
- Install mainline irrigation supply pipes along the gutters or overhead.
- Drop drip irrigation or NFT supply lines to the growing positions.
- Install drainage channels or collection systems; all drainage from the growing area should be collected and either recirculated or disposed of properly.
- Install fertigation equipment.
Step 9: Install Environmental Controls
- Mount the climate computer or environmental controller centrally.
- Connect temperature, humidity, CO₂, and light sensors to the controller.
- Connect all actuators: vent motors, heaters, fans, shade screens, and irrigation to controller outputs.
- Program set points for heating, cooling, venting, and irrigation.
- Commission and calibrate all sensors.
Step 10: Final Inspection, Testing, and Commissioning
- Walk the entire structure and check all covering for gaps, loose panels, or unprotected edges.
- Run all ventilation, heating, and irrigation systems through a full operational test.
- Verify emergency override functions work.
- Check all electrical installations meet local code requirements.
- Complete a final drainage test by running irrigation at full capacity and confirming proper drainage.
Best Practices for Greenhouse Builders
- Don’t cut corners on structural design. Greenhouses are large, light structures with significant wind and snow load exposure. Work from a professional engineer’s structural drawings.
- Thermal screens save energy. Installing a retractable thermal screen reduces nighttime heat loss by 30–50%, often the single highest ROI item in a heated greenhouse.
- Design for access. Include adequate door widths for tractors and harvest carts. Congested greenhouses are inefficient.
- Oversize your ventilation. Under-ventilated greenhouses become heat traps. Design for one air change per minute as a minimum.
- Consider gutters as drainage channels. Interior gutters should slope to drain points. Clogged gutters cause major structural and sanitation issues.
- Future-proof the electrical installation. Install extra conduit runs during construction to accommodate future lighting, automation, or monitoring equipment upgrades.
Common Greenhouse Construction Problems
1. Condensation Dripping onto Crops
Cold spots on the covering material cause condensation to form and drip.
To reduce this, improve ventilation to reduce interior humidity. Use anti-drip polycarbonate. Improve heating distribution.
2. Uneven Temperature Distribution
Poor airflow, cold floors, and inadequate heater placement. To solve this, add HAF fans to circulate air. Install perimeter floor heating. Reposition heaters to direct warm air at the crop level.
3. Structural Damage After Wind Event
Insufficient bracing, covering not properly secured, or the structure was underdesigned for local wind loads.
Always retrofit diagonal cable bracing in gable bays. Verify all wiggle wire and glazing channel connections are fully secured.
4. Film Covering Failing Prematurely
UV degradation, abrasion against sharp metal edges, and improper tensioning.
To prevent this, use only certified greenhouse film with UV stabilization rated for your climate. Pad any sharp edges. Ensure film is tensioned correctly; loose film flaps and degrades rapidly.
High-Tech Greenhouse Trends
- Vertical Farming Integration
Some modern greenhouse operations are incorporating vertical growing systems inside climate-controlled structures, growing leafy greens, herbs, and strawberries on stacked multilayer growing systems with LED lighting. This dramatically increases production per square meter.
- Glass Greenhouse Automation
The Netherlands, despite being a small, cold country, is the world’s second-largest food exporter largely thanks to its hyper-efficient glass greenhouse industry. Dutch greenhouses use fully automated climate computers, robotic harvesting, automated transport systems, and closed-loop water recycling to achieve production efficiencies far beyond what any open-field operation can match.
- Net Zero Energy Greenhouses
Research and commercial operations are advancing toward net-zero or even energy-positive greenhouses that combine:
- Heat pumps with aquifer thermal energy storage (ATES)
- Geothermal heating
- Solar panels integrated into the greenhouse structure
- Combined heat and power (CHP) systems using natural gas, with waste heat captured for greenhouse heating and CO₂ enrichment
- Building Information Modeling (BIM) for Greenhouse Design
Large greenhouse projects increasingly use BIM software to model the entire structure, climate systems, and crop layout in 3D before a single post is driven.
Cost Considerations and Economic Benefits
Typical Greenhouse Construction Costs
| Greenhouse Type | Cost per Square Foot (Approximate) |
| High tunnel (unheated poly) | KSh 260 – KSh 760 |
| Basic heated hoop house | KSh 650 – KSh 1560 |
| Commercial polycarbonate structure | KSh 1300 – KSh 3250 |
| Glass Venlo greenhouse (basic) | KSh 2600 – KSh 5200 |
| High-tech automated glass greenhouse | KSh 5220 – KSh 13000+ |
Economic Benefits
- Year-round production eliminates seasonal revenue gaps since a heated greenhouse can produce 12 months per year versus 4–6 months for outdoor growing.
- Higher crop value: Protected agriculture allows production of premium crops (specialty tomatoes, cucumbers, herbs, microgreens, strawberries) that command premium prices.
- Reduced crop losses: Weather events, pests, and disease pressure are dramatically reduced inside a greenhouse.
- Water efficiency: Closed-loop irrigation systems in greenhouses can recycle 90%+ of applied water.
- Payback periods for commercial greenhouse investments typically range from 5–12 years, with operations frequently profitable for 20–40+ years.
Safety Considerations
- Structural integrity: All greenhouse structures must be designed by or reviewed by a qualified structural engineer. Snow load and wind load failures can be catastrophic.
- Fall protection: Work at height on greenhouse roofs requires full fall arrest harness systems, anchored to rated anchor points.
- Electrical safety: All electrical installations in the humid greenhouse environment must use waterproof-rated components and comply with local electrical code.
- Gas systems: All natural gas or propane connections must be installed by a licensed gas fitter and pressure tested before commissioning.
- Pesticide handling: Greenhouses concentrate chemical applications. Use proper PPE (respirator, gloves, coveralls) when applying pesticides. Observe re-entry intervals strictly.
- Heat stress: Working inside a greenhouse during summer commissioning or crop production can involve temperatures exceeding 110°F. Ensure adequate water consumption, work in early morning hours, and watch for heat exhaustion symptoms.
Conclusion
Modern greenhouse construction is one of the most multidisciplinary and rewarding fields in the construction industry.
It demands structural knowledge, mechanical systems expertise, materials science understanding, and increasingly, digital and automation skills. For aspiring agri-builders, developing competency across all these domains opens opportunities not just in construction, but in consulting, equipment specification, greenhouse management, and agricultural engineering.