
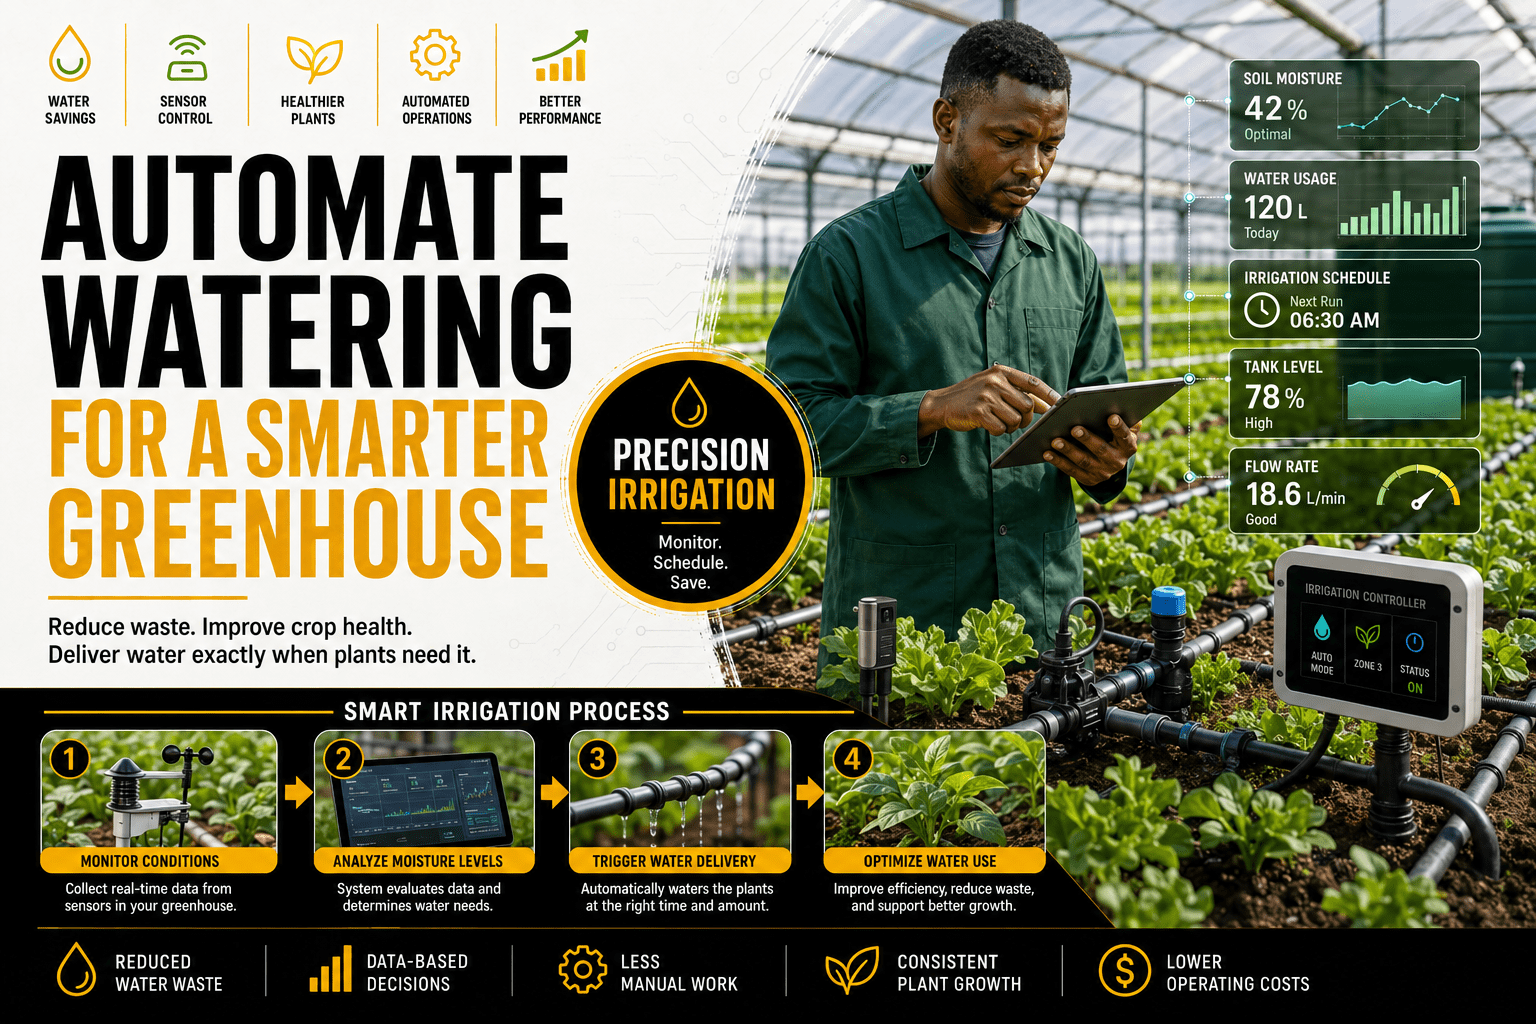
Water is the most critical input in agriculture, and how efficiently it is delivered determines whether a farm thrives or struggles. Across the globe, water scarcity is intensifying, irrigation costs are rising, and pressure on farmers to “do more with less” is increasing. Automated irrigation systems have emerged as one of the most powerful tools available to modern agriculture, capable of delivering precisely the right amount of water at exactly the right time with minimal human intervention.
This article will guide those exploring agricultural applications, farmers considering an irrigation upgrade, and experienced plumbers who want to expand their service offering into the agri-tech space.
Automated Irrigation
An automated irrigation system is a network of pipes, valves, emitters, and a controller that delivers water to crops without requiring someone to manually open and close taps.
Types of Automated Irrigation Systems
- Drip Irrigation (Micro-Irrigation) Water is delivered directly to the root zone of each plant through small emitters called drippers or drip emitters. It is the most water-efficient method, reducing water use by 30–50% compared to flood irrigation.
Mainly known for: Row crops, orchards, vineyards, raised beds, greenhouses.
- Sprinkler Irrigation Water is sprayed over crops from above through rotating or fixed sprinkler heads. Mimics rainfall.
Best for: Lawns, pastures, field crops, germination of seeds
- Subsurface Drip Irrigation (SDI) Drip lines are buried below the soil surface, delivering water directly to the root zone. Reduces surface evaporation and weed germination.Known for high-value row crops, perennial crops
- Center Pivot Irrigation A long boom of sprinklers rotates around a central pivot point, irrigating circular fields. Highly automated for large-scale operations. Used mainly in Large grain and forage crop fields
- Flood/Furrow Irrigation (Traditional) Water flows down furrows between crop rows. While not considered “automated” in the modern sense, automated gates and valves can control flow timing.
Key Terms to Know
- Flow rate: The volume of water moving through the system per unit of time, measured in gallons per minute (GPM) or liters per hour (L/h).
- Operating pressure: The water pressure at which the system is designed to function, measured in PSI (pounds per square inch) or bar.
- Emitter: Any device that releases water from the irrigation line: drippers, sprinklers, misters, or bubblers.
- Backflow preventer: A valve that stops irrigation water from flowing back into the potable water supply required by law in most jurisdictions.
- Controller/Timer: The brain of the automated system; programs when and how long each irrigation zone runs.
- Solenoid valve: An electrically operated valve opened and closed by the controller to control water flow to each zone.
- Soil moisture sensor: A probe inserted into the soil that measures water content and signals the controller to skip or reduce irrigation when sufficient moisture is present.
- ET (Evapotranspiration): The combined rate of water lost from the soil (evaporation) and from plants (transpiration). Smart irrigation controllers use ET data to calculate optimal irrigation schedules.
Tools, Equipment, and Materials Needed
Plumbing Tools
- Pipe cutters (PVC and poly pipe) – Clean cuts without cracking pipe
- Solvent weld kit – PVC primer and cement for joining rigid PVC pipe
- Insert fittings and crimp rings – For poly drip tubing connections
- Thread tape (PTFE/Teflon) – For sealing threaded fittings
- Hole punch – For inserting drip emitters into poly tubing
- Pipe wrenches and adjustable wrenches
- Trenching spade or mechanical trencher – For burying mainlines
- Pressure gauge – For testing system pressure at various points
Materials and Components
Pipe and Tubing:
- PVC mainline pipe (typically 1″–2″ diameter) – For the primary water supply line
- Polyethylene (poly) lateral tubing (16mm or 5/8″) – The main distribution line
- Drip emitter tubing (4mm or 1/4″ spaghetti tubing) – Runs from lateral to individual plants
Fittings:
- Ball valves, tee fittings, elbow fittings, end caps, goof plugs (for blocked holes)
- Insert fittings (barbed) for poly connections
- Compression fittings for emitter tubing
Valves and Controls:
- Solenoid valves (24VAC or DC latching) – One per irrigation zone
- Backflow preventer (mandatory in most regions)
- Pressure regulator – Reduces supply pressure to system operating pressure (typically 10–30 PSI for drip)
- Filter/strainer – Prevents debris from clogging emitters
- Irrigation controller – Programmable timer or smart controller
Emitters:
- Drip emitters (0.5, 1, 2 GPH ratings)
- Inline drippers (pre-installed in drip tape)
- Micro-sprinklers or mini-sprayers
- Sprinkler heads (pop-up or stationary)
Power and Communication:
- Valve wire (multi-conductor, direct burial rated) – Connects controller to solenoid valves
- Junction boxes (weatherproof) – For wire connections in the field
- Conduit – For protecting wire runs above ground
- Solar panel and battery (for remote systems without grid power access)
Smart System Components
- Soil moisture sensors (capacitance-type or tensiometers)
- Weather station or ET sensor
- Smart irrigation controller (e.g., Rain Bird IQ, Hunter ROAM, Baseline BaseStation 3200)
- Flow meter – Detects leaks and monitors water usage
- 4G/WiFi modem – For remote monitoring and control
How To Install Irrigation Systems
Step 1: Plan the System on Paper
Before touching a tool, design the system on paper (or use irrigation design software like Rain Bird Design Software or Hunter’s Hydrawise).
- Measure the field or greenhouse area to be irrigated.
- Identify the water source (well, municipal supply, storage tank) and measure the available flow rate (GPM) and static pressure (PSI).
- Map the crop layout – spacing between rows and between plants within rows.
- Determine the number of irrigation zones required (each zone is one solenoid valve controlling a section of the system).
- Calculate drip emitter flow rates per zone to ensure the zone total does not exceed available GPM.
- Determine pipe sizes for mainlines and laterals based on flow calculations.
Step 2: Install the Water Source Connection and Header Assembly
- Connect to the water supply line at the appropriate size.
- Install a master shutoff valve for emergency isolation.
- Install a backflow preventer; this is legally required in most jurisdictions to protect the potable water supply from contamination. Use a reduced pressure zone (RPZ) assembly for agricultural systems.
- Install a filter/strainer downstream of the backflow preventer (155-mesh for drip; 80-mesh for sprinklers).
- Install a pressure regulator if your supply pressure exceeds the system’s operating pressure.
- Install a flow meter if monitoring water use is required.
Step 3: Install the Controller and Solenoid Valves
- Mount the irrigation controller in a weatherproof enclosure at a central location.
- Install solenoid valve manifolds at the head of each irrigation zone. Space manifolds to minimize wire runs.
- Run multi-conductor valve wire from the controller to each solenoid valve. Use waterproof wire connectors at all field splices.
- Connect the common wire (ground) from each solenoid to the “COM” terminal on the controller.
- Connect each zone wire to its corresponding numbered terminal.
- Test each solenoid by manually activating it from the controller.
Step 4: Lay the Mainline Pipe
- Mark the route of the mainline pipe from the header assembly to each zone.
- Dig a trench 8–12 inches deep (or per local frost depth requirements) along the mainline route.
- Lay PVC or poly mainline pipe in the trench. Use appropriate fittings for turns and branches.
- Install tee fittings at each zone valve location.
- Cap the end of the mainline for pressure testing.
Step 5: Pressure Test the Mainline
- Cap all open ends.
- Connect a pressure gauge to the system and fill with water.
- Pressurize to 1.5× the operating pressure (e.g., 60 PSI if operating at 40 PSI).
- Hold pressure for 30 minutes. Any drop indicates a leak, locate and repair before burying.
Step 6: Install Lateral Lines and Emitters
- Connect poly lateral tubing to the solenoid valve outlets using insert fittings.
- Lay laterals along the length of the crop rows, securing with ground stakes every 3–5 feet.
- Use a hole punch to punch holes in the lateral tubing at each plant location.
- Insert drip emitters of the correct flow rate (0.5, 1, or 2 GPH depending on plant water requirements) into each punched hole.
- Alternatively, for row crops, lay drip tape (pre-installed inline emitters, typically 12″ or 18″ spacing) directly on the soil surface or just below.
- Cap the end of each lateral with an end cap or flush valve.
Step 7: Install Soil Moisture Sensors
- Select representative locations in each irrigation zone for sensor placement at the root depth of the crop.
- Install sensors per manufacturer instructions, typically 6–12 inches deep for shallow-rooted crops, 12–24 inches for deep-rooted crops.
- Run sensor wire back to the controller, or pair wireless sensors to the controller’s receiver.
- Program sensor threshold values.
Step 8: Program the Controller
- Set the current date and time.
- Program start times for each zone are typically early morning (4–7 AM) to minimize evaporation.
- Set run times per zone based on emitter flow rate and crop water requirement calculations.
- Set the number of irrigation cycles per day (one is typical; more in hot/sandy conditions).
- Enable weather-based adjustments if using a smart controller.
- Set up leak detection alerts if a flow meter is installed.
Step 9: Flush and Test the Complete System
- Before capping all ends, flush the system to remove debris.
- Open each zone valve and let water run freely for 2–3 minutes.
- Cap all ends, then run the system through a full cycle.
- Walk the entire system and inspect every emitter for proper flow.
- Look for leaks at all fittings, valve connections, and solenoid bodies.
- Check system pressure at the end of each lateral — it should be within ±10% of design pressure.
Step 10: Backfill Trenches and Final Documentation
- Backfill mainline trenches with native soil, tamping every 6 inches.
- Mark valve locations on a site map for future reference.
- Document all zone numbers, emitter flow rates, and controller settings.
- Provide the farm operator with a complete system manual and training on controller programming.
Tips for Irrigation Installers
- Always design before you dig. Even simple systems benefit from a layout plan, which prevents costly mistakes.
- Use quality components. Cheap solenoid valves and emitters fail quickly. Name-brand components last for decades with proper maintenance.
- Over-size mainlines slightly. It costs little to go one pipe size larger during installation, but retrofitting an undersized mainline later is very expensive.
- Filter is everything for drip systems. Drip emitters have tiny orifices that clog easily. A high-quality filter changes from a maintenance item to a money-saver.
- Install flush valves at the ends of drip laterals to allow periodic flushing to prevent emitter clogging.
- Label every valve and wire. Future maintenance will be far easier.
- Use a rain sensor or smart controller; it will pay for itself in water savings within one season in most climates.
Common Irrigation Problems
1. Zone Will Not Turn On
Blown fuse in controller, faulty solenoid coil, broken valve wire, and low water pressure. Always, test solenoid resistance with a multimeter, typically 20–60 ohms. Test wire continuity. Checkthe controller output voltage should be 24VAC at the zone terminal.
2. Drip Emitters Clogging Repeatedly
Insufficient filtration, algae growth in lines, hard water mineral deposits. Upgrade filter mesh. Inject chlorine solution (flush with 10 ppm chlorine once per week). Use acid injection (pH adjustment) if hard water is the cause.
3. Uneven Water Distribution
Excessive pressure variation, emitters of different flow rates mixed, partially blocked emitters Solution: Test pressure at multiple points. Install a pressure regulator if pressure is inconsistent. Replace mixed emitters with matched flow rates.
4. Controller Not Running Schedules
Causes: Power failure, blown fuse, incorrect programming, rain sensor holding system off Solution: Check power supply. Verify rain sensor is not overriding the schedule. Check internal battery backup.
5. Water Pooling Around Emitters
Causes: Emitter flow rate too high for soil infiltration rate, soil compaction Solution: Switch to lower-flow emitters. Use pulsed irrigation (shorter cycles, more frequent) to allow soil to absorb water between cycles.
The Future of Smart Irrigation
-
Precision Irrigation and IoT
The integration of the Internet of Things (IoT) into irrigation has created systems that are self-managing. Modern smart irrigation platforms use:
- Wireless soil moisture sensor networks that transmit real-time data to the cloud
- Machine learning algorithms that learn crop water requirements over time and optimize schedules dynamically
- Remote control via smartphone apps adjusts, monitors, and diagnoses the system from anywhere in the world
- Integration with weather APIs – if rain is forecast, the system automatically skips irrigation
-
Variable Rate Irrigation (VRI)
Center-pivot systems equipped with VRI technology can vary the amount of water applied across different zones of a field in real time, responding to soil type maps, yield history, and topography data. This reduces water waste and improves crop uniformity.
-
Fertigation
Automated irrigation systems can be integrated with fertigation equipment, injecting liquid fertilizer directly into the irrigation water. This delivers nutrients precisely to the root zone, improving fertilizer efficiency by up to 40% compared to surface broadcasting.
-
Regulatory and Water Rights Considerations
In many jurisdictions, irrigation installations require permits. Water rights, the legal right to use a specified quantity of water from a source, are strictly regulated in arid regions. Plumbers working in agricultural irrigation must be aware of local water law, backflow prevention regulations, and installation licensing requirements.
Safety Considerations
- Electrical safety: Solenoid valve wiring operates at 24VAC low voltage, but all wire connections should use waterproof connectors to prevent short circuits in wet soil conditions.
- Backflow prevention: Failure to install a proper backflow preventer can contaminate municipal or shared water supplies with fertilizers, pesticides, and pathogens. This is a legal and public health requirement.
- Trenching safety: Trenches over 5 feet deep require shoring per OSHA regulations. Always call 811 (USA) or the local equivalent to mark underground utilities before digging.
- Chemical injection safety: Fertigation and chlorination require chemical-resistant materials and proper safety equipment (gloves, goggles). Never mix chemicals in concentrated form.
- Pressure testing: Pressurize systems slowly and never exceed test pressure. Stand clear of caps and fittings during pressure testing.
Conclusion
Automated irrigation systems represent one of the most significant technological advances in modern agriculture and one of the most rewarding new frontiers for skilled plumbers and technicians.
The ability to deliver the right amount of water, at the right time, to the right place is transforming farm productivity and sustainability around the world.
For students and technicians ready to expand their expertise, mastering automated irrigation opens doors to agricultural consulting, greenhouse design, agri-tech installation, and water management, all rapidly growing fields.
To get you started, start with us today at Sensei College.